

Note: this will likely become obsolete when the planned upgrade to the NAPP forum takes place. They may change the interface. I'll come back and comment here and try to update this article when that happens.This post is intended for NAPP members who are having difficulty posting pictures on the forum and are therefore not participating in some of the activities.
It’s actually quite easy to upload pictures to the NAPP forum. There are some other threads on the forum that give you various choices and methods, but here’s how I like to do it.
- Choose your picture or pictures and resize them to a maximum width of 800 pixels.
- Upload them to a site on the internet.
- Copy the link to that image
- Select the “picture” icon in the post you’re writing
- Paste the link into the field in the popup box.
- For consistency and of course file size constraints, the NAPP forum allows you to post JPEG images up to 800 pixels wide.
If you’re using Lightroom, simply export with that size limitation. Mine go to a designated folder on my hard drive called, “NAPP” (creative, huh?). I also try to limit the file size to 100K but occasionally they go over that if they’re complex. In Photoshop, the best solution is usually “Save for Web and Devices” and again you can set your size limitations there.

Generally I try to name the files something simple so I can type them easily later. I also like to put a watermark on the pictures, unobtrusive, in the lower corner. It just makes me feel better.

- You need to have a place to put them on the internet, that you can link to. There are a ton of free places: Flickr, Picasa, Photobucket… I’ll leave that to you. But choose one where you can link to the photo, not to the page it’s on. For instance, you can put your pix up on SmugMug (if you have an account) but finding the link to that particular picture is convoluted.
I have my own website at a big web host, that allows me to FTP my files up there (I think it costs me all of $2.99 per month, for my own Domain name!): and I called the folder I put them in, (ready for this?) “NAPP”. I personally use a couple of different FTP clients, but my favourite one is something called “WinSCP” which is free, and has sticky settings which means it’s only one keystroke to get it going!

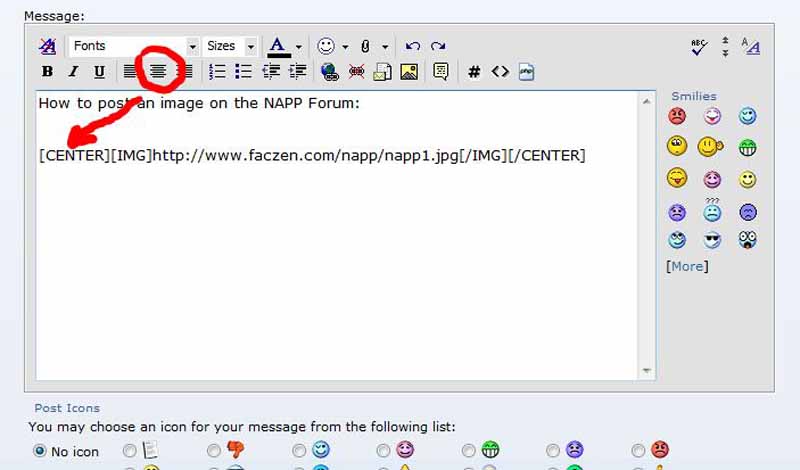
- Now I write the message I want to post on the forum. I put the cursor where I want the picture to appear (looks best with a couple of blank lines before and after it) and I click the “picture” icon in the menu bar. A window pops open that lets me paste the URL I copied in step 3 into the field and when I hit <Enter> it automatically puts the following code in the message:
[IMG]http://www.urllocation/NAPP/filename.jpg[/IMG]

After I’m done, I usually like to go back and highlight that line, then click the “center” icon because I think it looks better if the picture is centered in the post.
Just to make sure you got it right, click “Preview Post” before you actually publish it. It also gives you a chance to (a) correct all your typos and (b) think about deleting all the nasty things you were going to post before they actually get up there!


So that’s it. A really easy way to post images to the NAPP forum. Make sense? Any questions? Give it a shot!
— 30 —