Background: (pardon the pun!)
A few years ago I shot at an indoor orchid show where they had set up black backgrounds (tar paper or tentest) and the pictures were great!
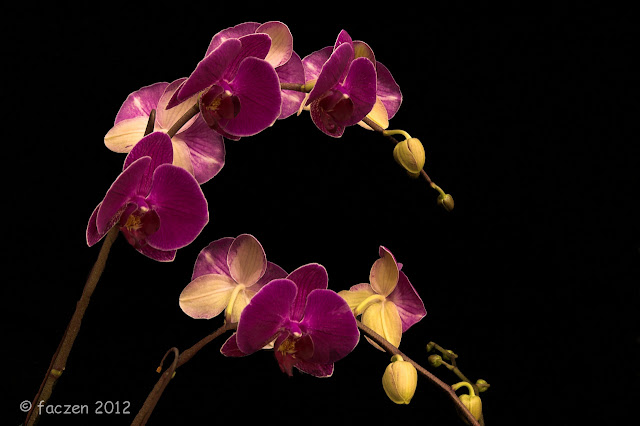 |
This was quite a long exposure, but at f/16 and with off-camera flash (my SB-600 handheld high and to the left). The black background was already set up there by the show organizers. |
I haven't shot this kind of setup recently, in fact it's about 4 years. I became interested in doing the same thing but out in the field.
This article is NOT about how to light these shots, not really. It's about the backdrop. And how to do it "on the cheap". Also I'm a lazy guy and the less I have to carry with me in the field, the better.
So here's a really cheap and dirty solution.
- Go to a fabric store and buy a square of black cloth. I bought a 1m square piece (I think it was 48"x40" actually) and it cost me $4.
- Go to a hardware store and buy 4 little A-clamps. Sometimes you can get them in a set, but I bought loose ones for $1.99 each.
So my total expenditure was under $12 before taxes and the gas to drive to the two stores!
Next step:
- Use a couple of the clamps to hang up the black cloth behind whatever it is you want to shoot.
- You can also find two sticks, make them in the shape of an "X" and use the clamps to stretch your cloth over the sticks to make a black square thing.
- I also have a pop-up reflector that came in a black bag. You can use that as the backdrop as well for small (macro) shots.
The trick is to prevent light from falling on the cloth. And try to keep it a distance away from your subject if you can so any imperfections are more likely to be out of focus (wrinkles, dirt).
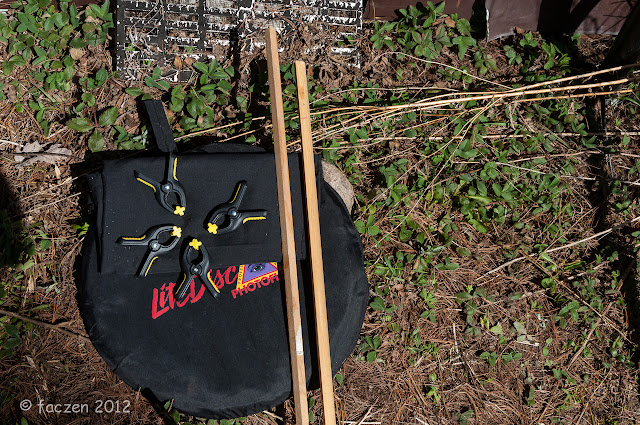 |
Here's all my stuff. One black cloth, four little clamps and two sticks. They're all sitting on top of my reflector disk in its black sleeve, but you don't need that! |
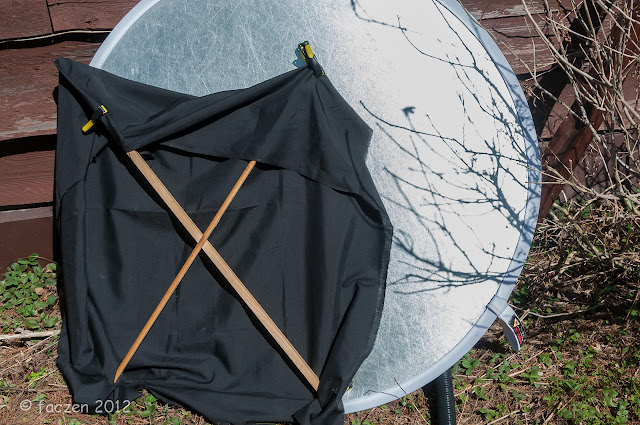 |
This is the setup with the cloth stretched over the sticks. |
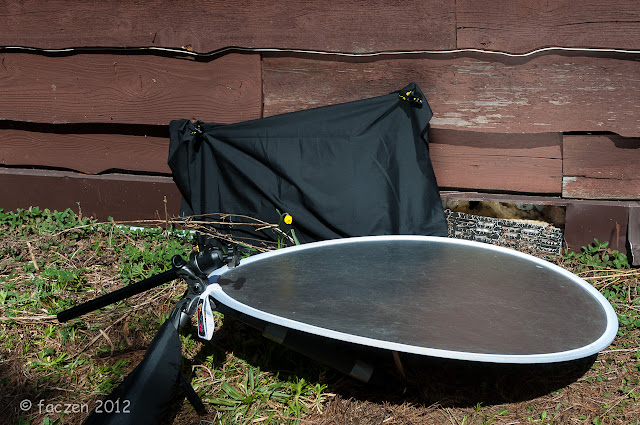 |
Here's the shooting setup for the following picture. This is my one and only (first of the year) daffodil. It was kind of droopy so I propped it up with some dead branches. Of course the camera would be on the tripod but then how could I take the picture of the setup? (I loaned my P&S to a friend who's in Israel right now. I could have used my Blackberry, I suppose...) |
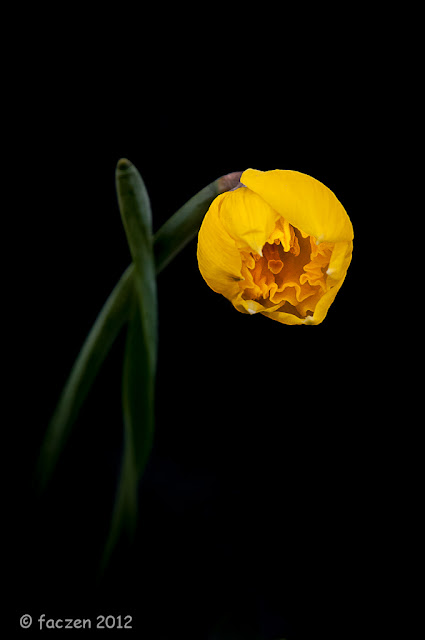 |
This is the resulting image. I admit to doing a little work on it in post but like I said, this article is about the backdrop, not the lighting or processing. OK, as long as I'm here... I imported it to LR4 and darkened the shadows. I sharpened it and de-noised it a bit, then took it out to CS5 and added a hi-pass sharpening layer, dodged and burned here and there, cloned out some green stuff at the bottom and so on. When I came back to Lightroom, I cropped it and did a post-crop vignette. Probably 15 minutes total. 1/80 sec @f/11, ISO 400, 120mm. |
Now the sun was directly behind my back, close to the middle of the day. Just about the worst lighting you could imagine. So I shaded both the flower and the backdrop with my body, but I realized that I should bring some light inside the flower to enhance the stamen. I did that by laying the reflector on the ground in the sunlight and aimed it at the flower.
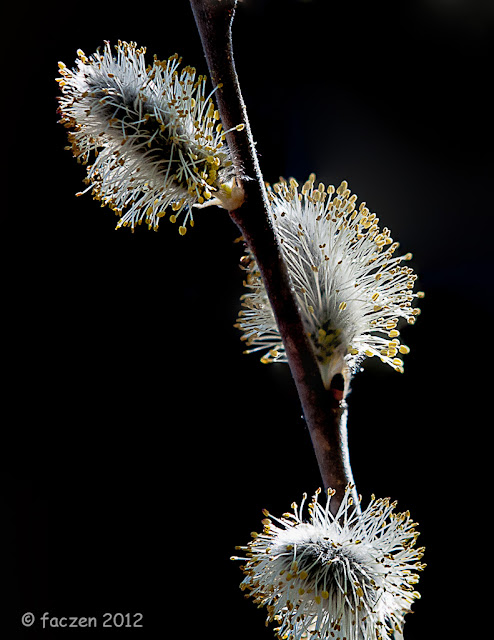 |
I shot this one a few days ago by simply hanging the black cloth from some branches behind the willow buds. The sun was behind and to the right; I made sure the lens was shaded by the cloth to avoid flare. 1/2000 sec @ f/5.6, ISO 400, 200mm |
So that's the whole trick. These shots would probably have benefitted from some off-camera flash fill, but in a pinch you don't really need it if you can keep the backdrop in the shade.
There's a good article on how to use an "invisible black backdrop" on
Glyn Dewis' blog but for that you really do need flash.
My whole kit is inside my folded up reflector disk bag. Easy to take with me in the field. I'll probably use a separate tripod for positioning the off-camera flash when I go out shooting trilliums next month. I'll post some pictures over on
my other blog when I do.
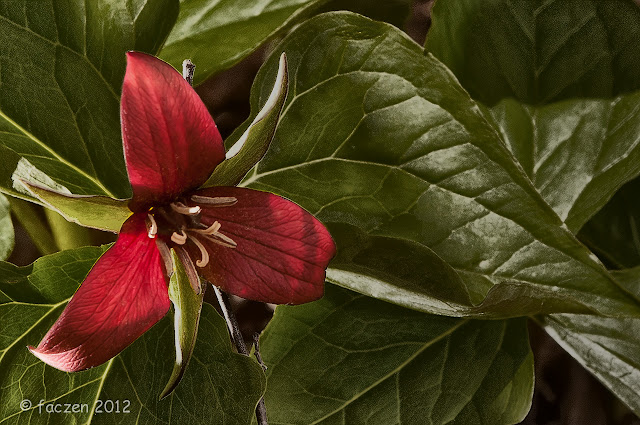 |
Here's a red trillium I shot last year with off-camera flash but no backdrop. 1/160 @ f/8, ISO 200, 200mm |
By the way, I don't normally shoot a lot of flowers and I don't even own a macro lens!
— 30 —


